
ReKernel: Linux on a 386, Again
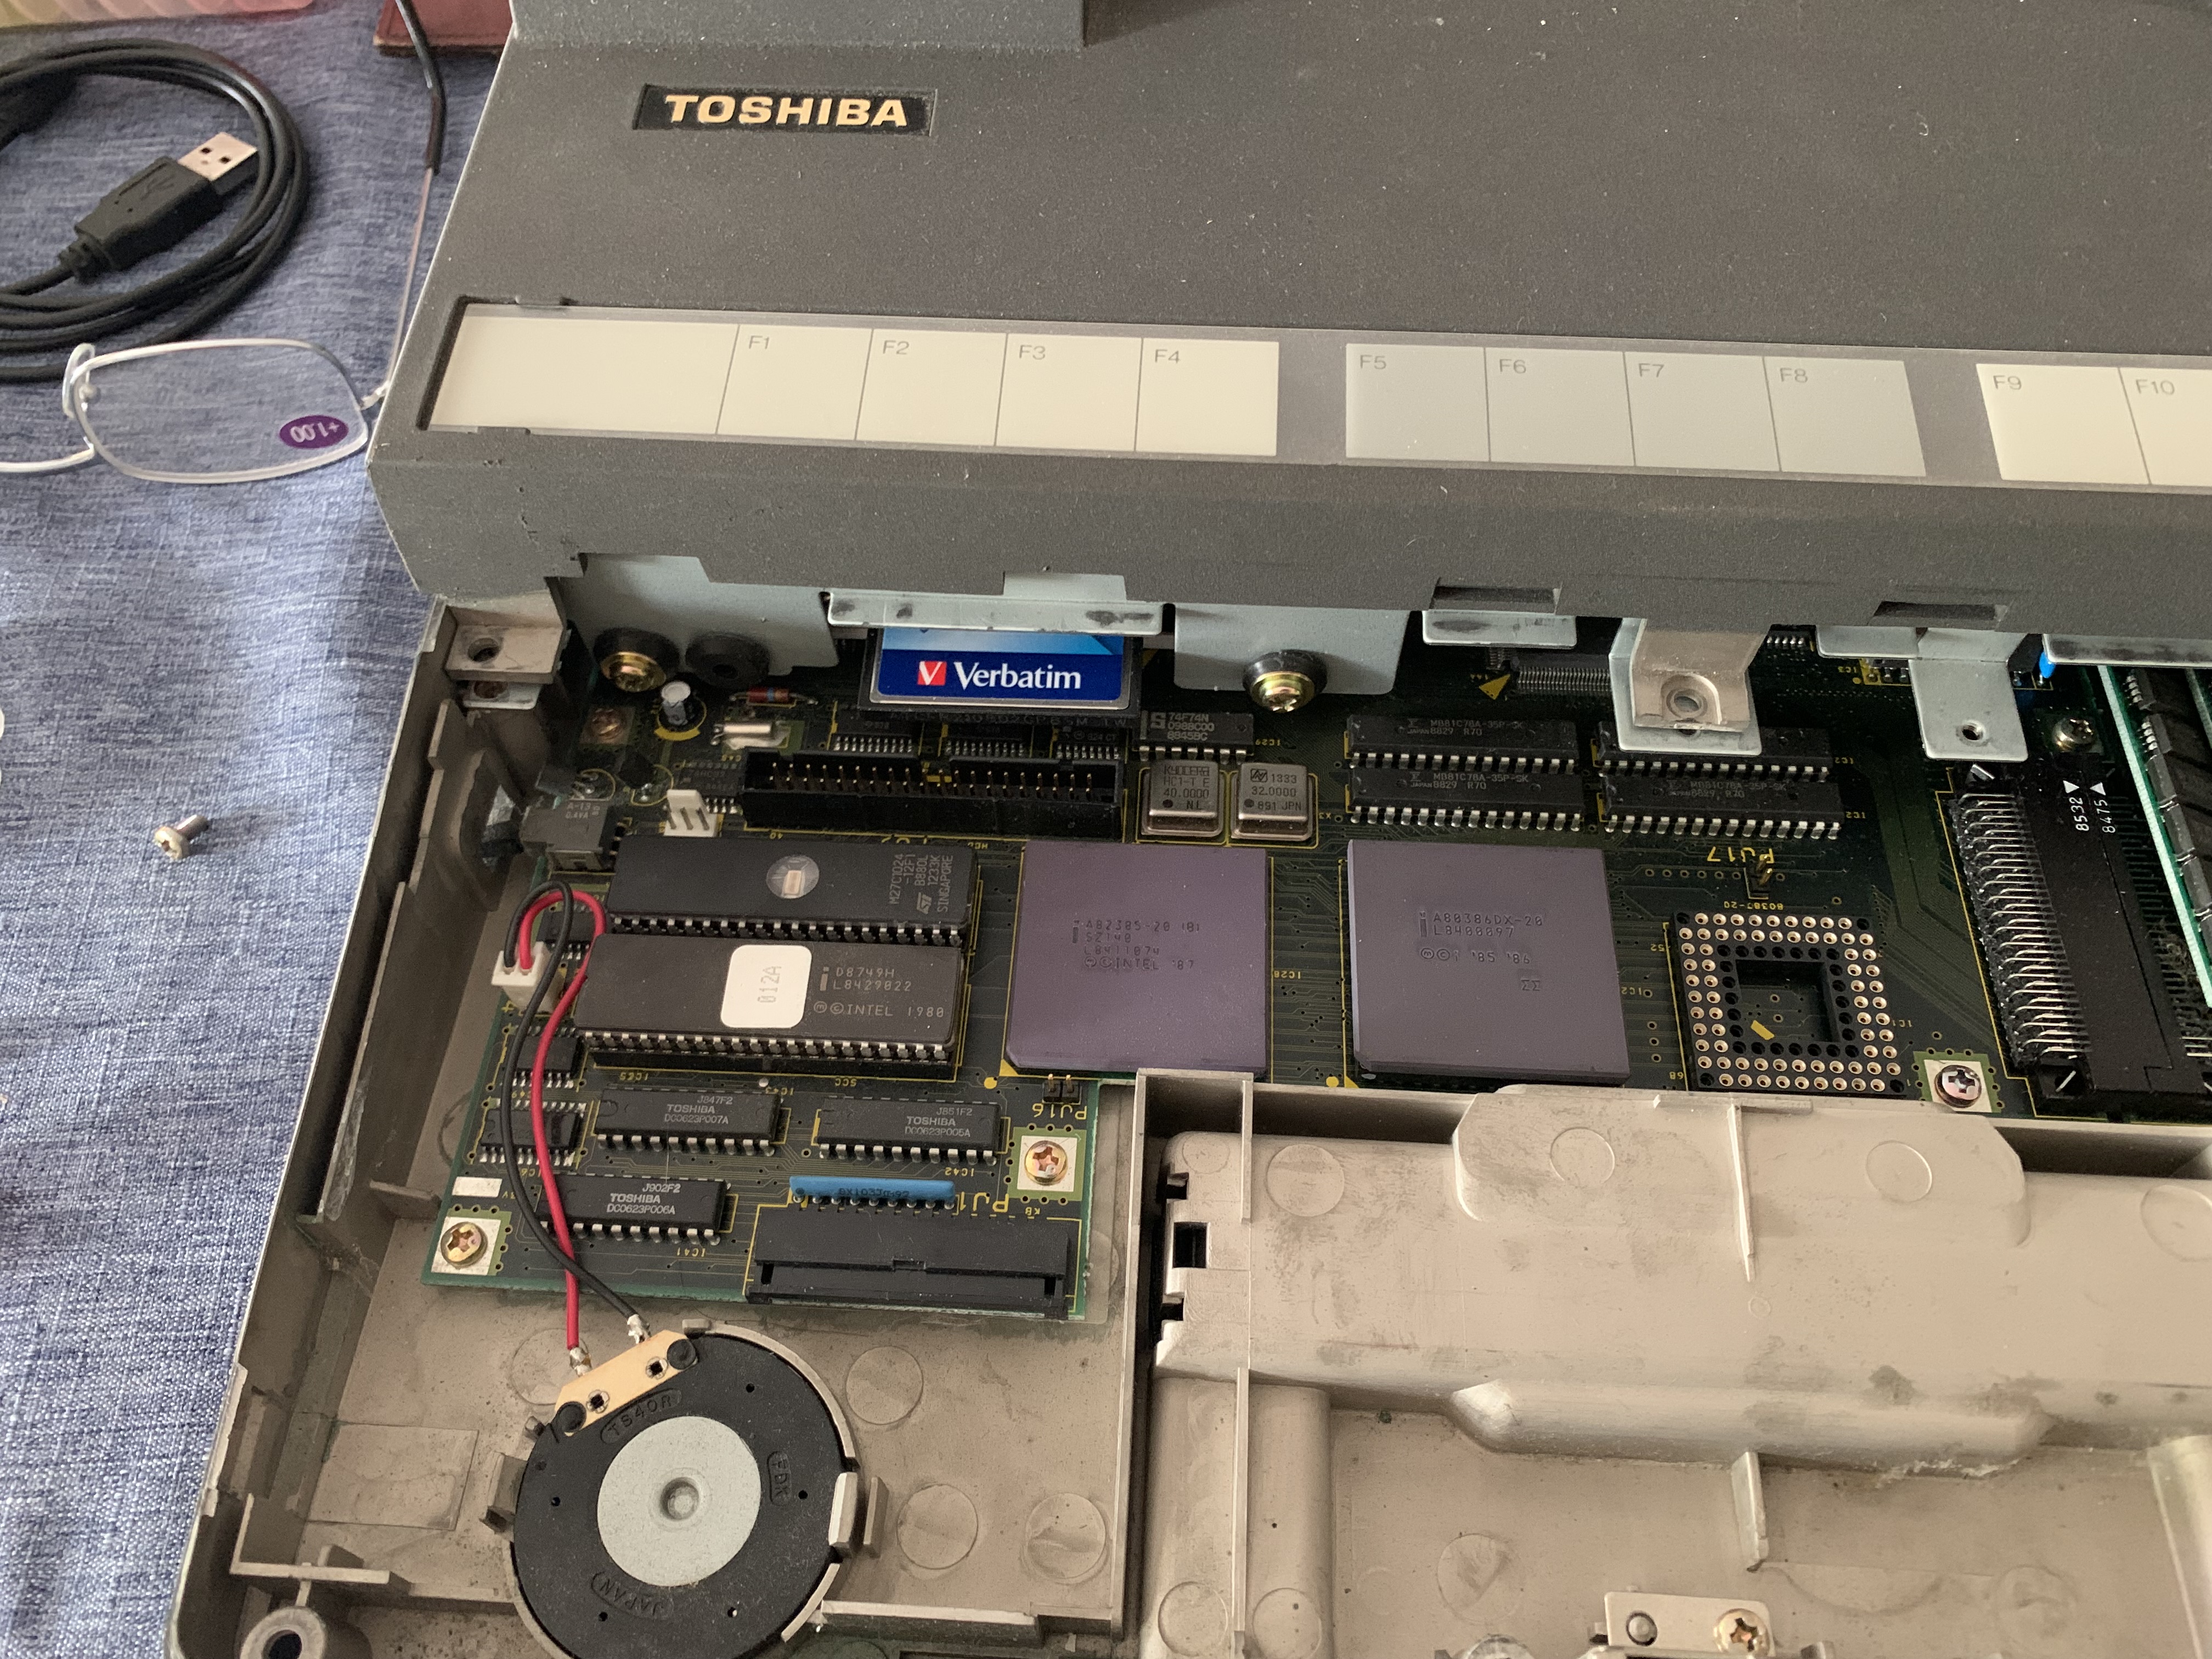
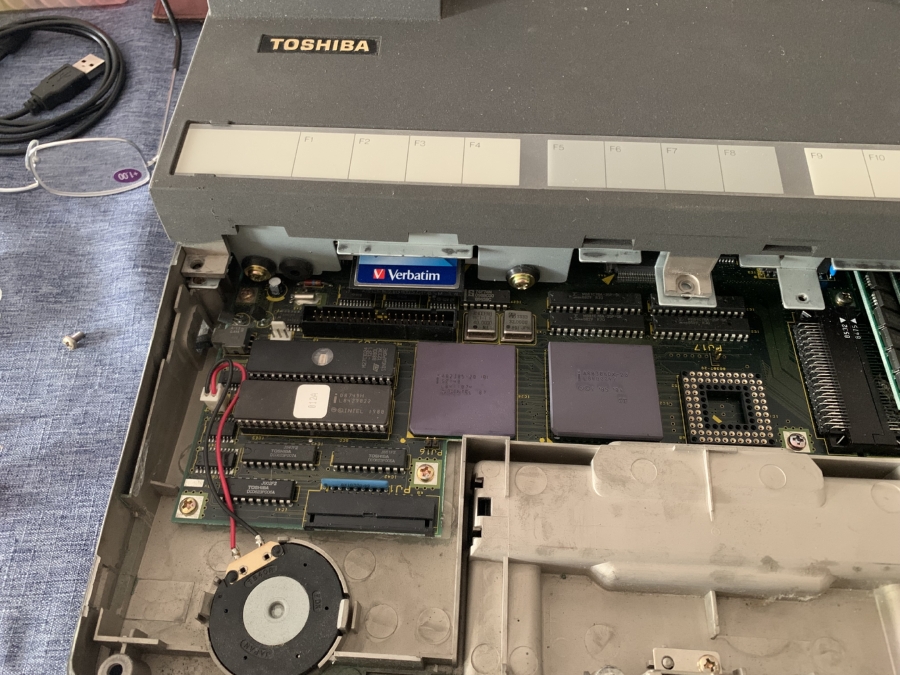
In May of 2024 I acquired a couple of Toshiba luggables, one of them being a T5200. The T5200 is a 20Mhz 386DX with an orange gas plasma screen with VGA resolution. The internal hard drive is a Conner desktop 3.5” drive with an IDE interface. The RAM unfortunately is non-standard and uses proprietary Toshiba 40-pin simms, something that was used in only 2 or 3 models of Toshiba computers and impossible to find these days. Luckily mine came with two 1MB SIMMs, bumping the total RAM to 4MB.
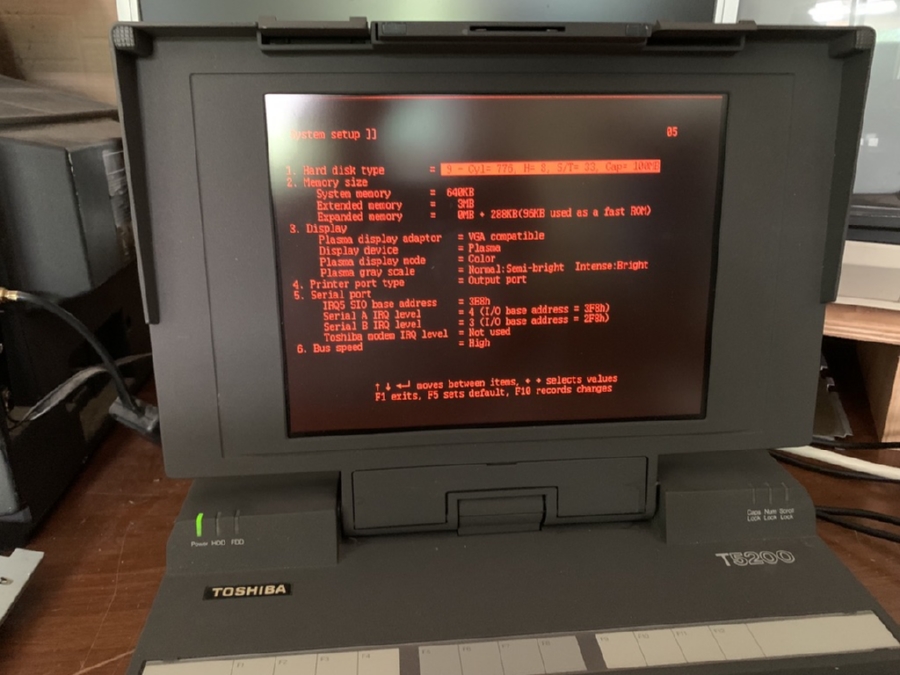
 T5200 in BIOS setup
Towards the end of November I was suddenly inspired to try to get my Toshiba T5200 booted up, thinking it might be fun to bring with me for the holidays. It powers up and memory tests and I could go into the settings and change things around, but there was no way to boot it because both the hard drive and floppy were dead. Replacing the hard drive isn’t trivial, both because of the amount of disassembly required, and because Toshiba restricted the BIOS and allowed only three specific models of hard drives to be used. No option for custom settings to allow using any hard drive laying around. My original plan was to steal the hard drive from another Toshiba luggable, but that hard drive model was *not* one of the permitted ones.
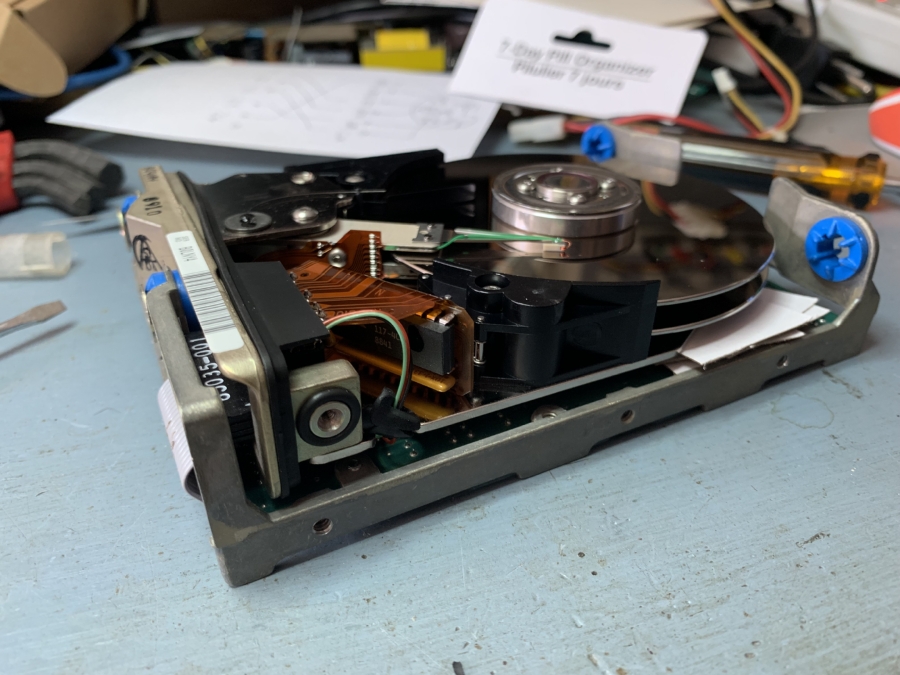
Not giving up that easily, I took apart the dead 40MB drive from the T5200 to see if I could get it running again (similar to what happened with #FreezerDrive). It was tricky to disassemble, but I was able to manually spin the drive and get it running. I made a copy of the drive and then put it back in the T5200 and it booted up! However it was obvious that was not going to last so I went searching for another solution.
 Hard drive removed from its can
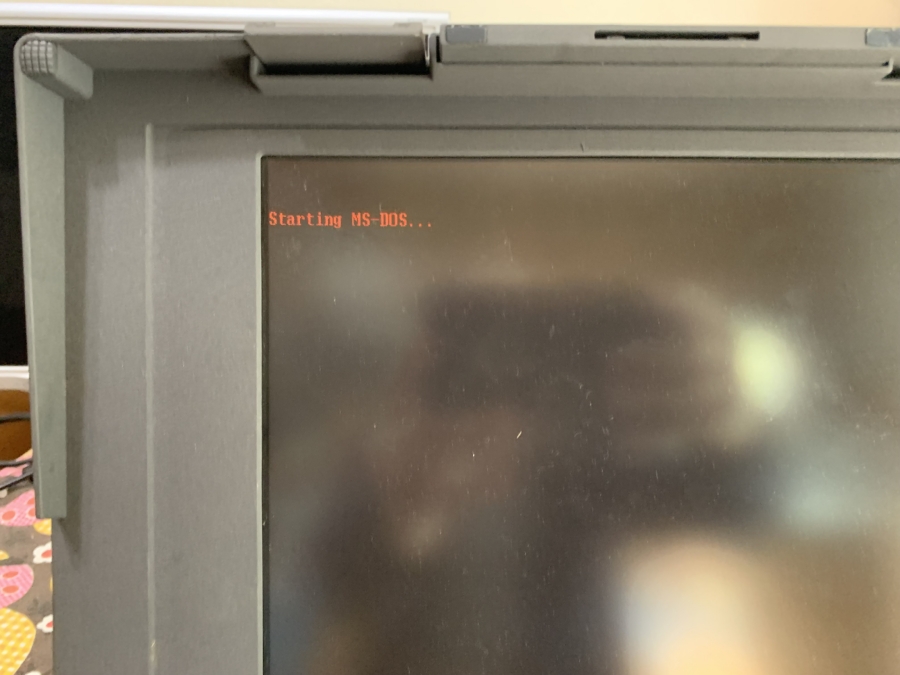
 MS-DOS booting from the formerly dead hard drive
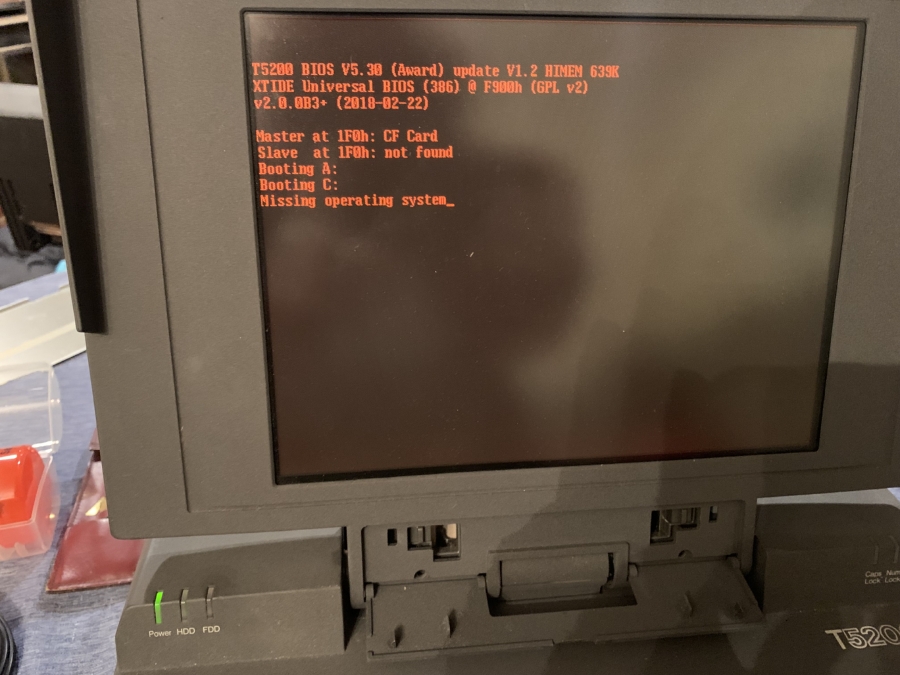
I found that IanB on Vogons had modified the T5200 BIOS to include XT-IDE and all I needed to do was burn a new EPROM. Unfortunately none of the EPROMs, EEPROMs, or flash chips I had were compatible with the 27C1024 that the T5200 uses. I found some on eBay that would ship from China and took a gamble on them being fake. But coming from China they didn’t arrive until just a few days before Christmas and I didn’t have time to fiddle with them. That meant the T5200 was going to have to stay home, but there was not enough room in the car anyway.
After returning from Christmas I had the time to test the 27C1024 chips that arrived from China. Turned out that not only were they the real thing, they were NOS and were already blank and had never been used! Not having to mess around with erasing them saved me quite a lot of time. With the XT-IDE integrated BIOS installed and working, the next thing to do was replace the drive. I installed a 2GB CompactFlash card with adapter in place of the IDE drive and made it so the CF card pokes out into the keyboard bay, making it possible to remove without having to disassemble the entire machine. This seemed like a good solution since all of the other “user upgradable” things were also under the keyboard.
 XT-IDE detected CF card
 CompactFlash card poking into keyboard bay
—
With a new solid state hard drive, the next thing to do was see if I could get Linux going. My main reason for getting the Toshiba T5200 was entirely because I wanted to get Linux going on it. I knew this was going to be a challenge for a lot of reasons, not just because the machine is very old and most distros dropped 386 support around two decades ago, and the kernel itself officially dropping support more than a decade ago. With no working floppy drive I couldn’t just download an old distro and write it floppies to install. Plus, with only 4MB of RAM, it was going to be tough to do much of anything, even if I could get a Linux kernel to boot. Not only that, building an old kernel from source is challenging because modern distros don’t have the required 386 support in their development environments.
Inspired by my project of getting modern Linux running on a 486 a couple of years ago (no longer possible now, 486 support was dropped in Linux 6.0), I wanted to see if I could at least run the most recent version of Linux that had 386 support. While 3.7.10 is supposed to be the last version that still worked on a 386, it’s actually version 3.3.8. However someone took on the task of patching 3.7.10 to make it compile for a 386.
To deal with the lack of a working floppy drive, my plan was to use LOADLIN to boot into Linux from DOS. I could copy the kernel into a folder in DOS, either via serial transfer, or by using SneakerNet with the CF card.
After stripping down the kernel to what seemed like the bare minimum just to get it to boot far enough to print some error messages, I gave it a try using QEMU limited to 4MB of RAM, same as the T5200. It loaded fine, so I transferred the compiled bzImage to the T5200. I passed the correct arguments to LOADLIN and it said it was loading, but then immediately rebooted. This was obviously not going to be easy to make work. More tinkering and I discovered that there was an option in the T5200 BIOS to configure all the RAM as extended and none as expanded. When I tried LOADLIN again it didn’t reboot, it cleared the screen and put a blinking cursor at the top, and then promptly hung.
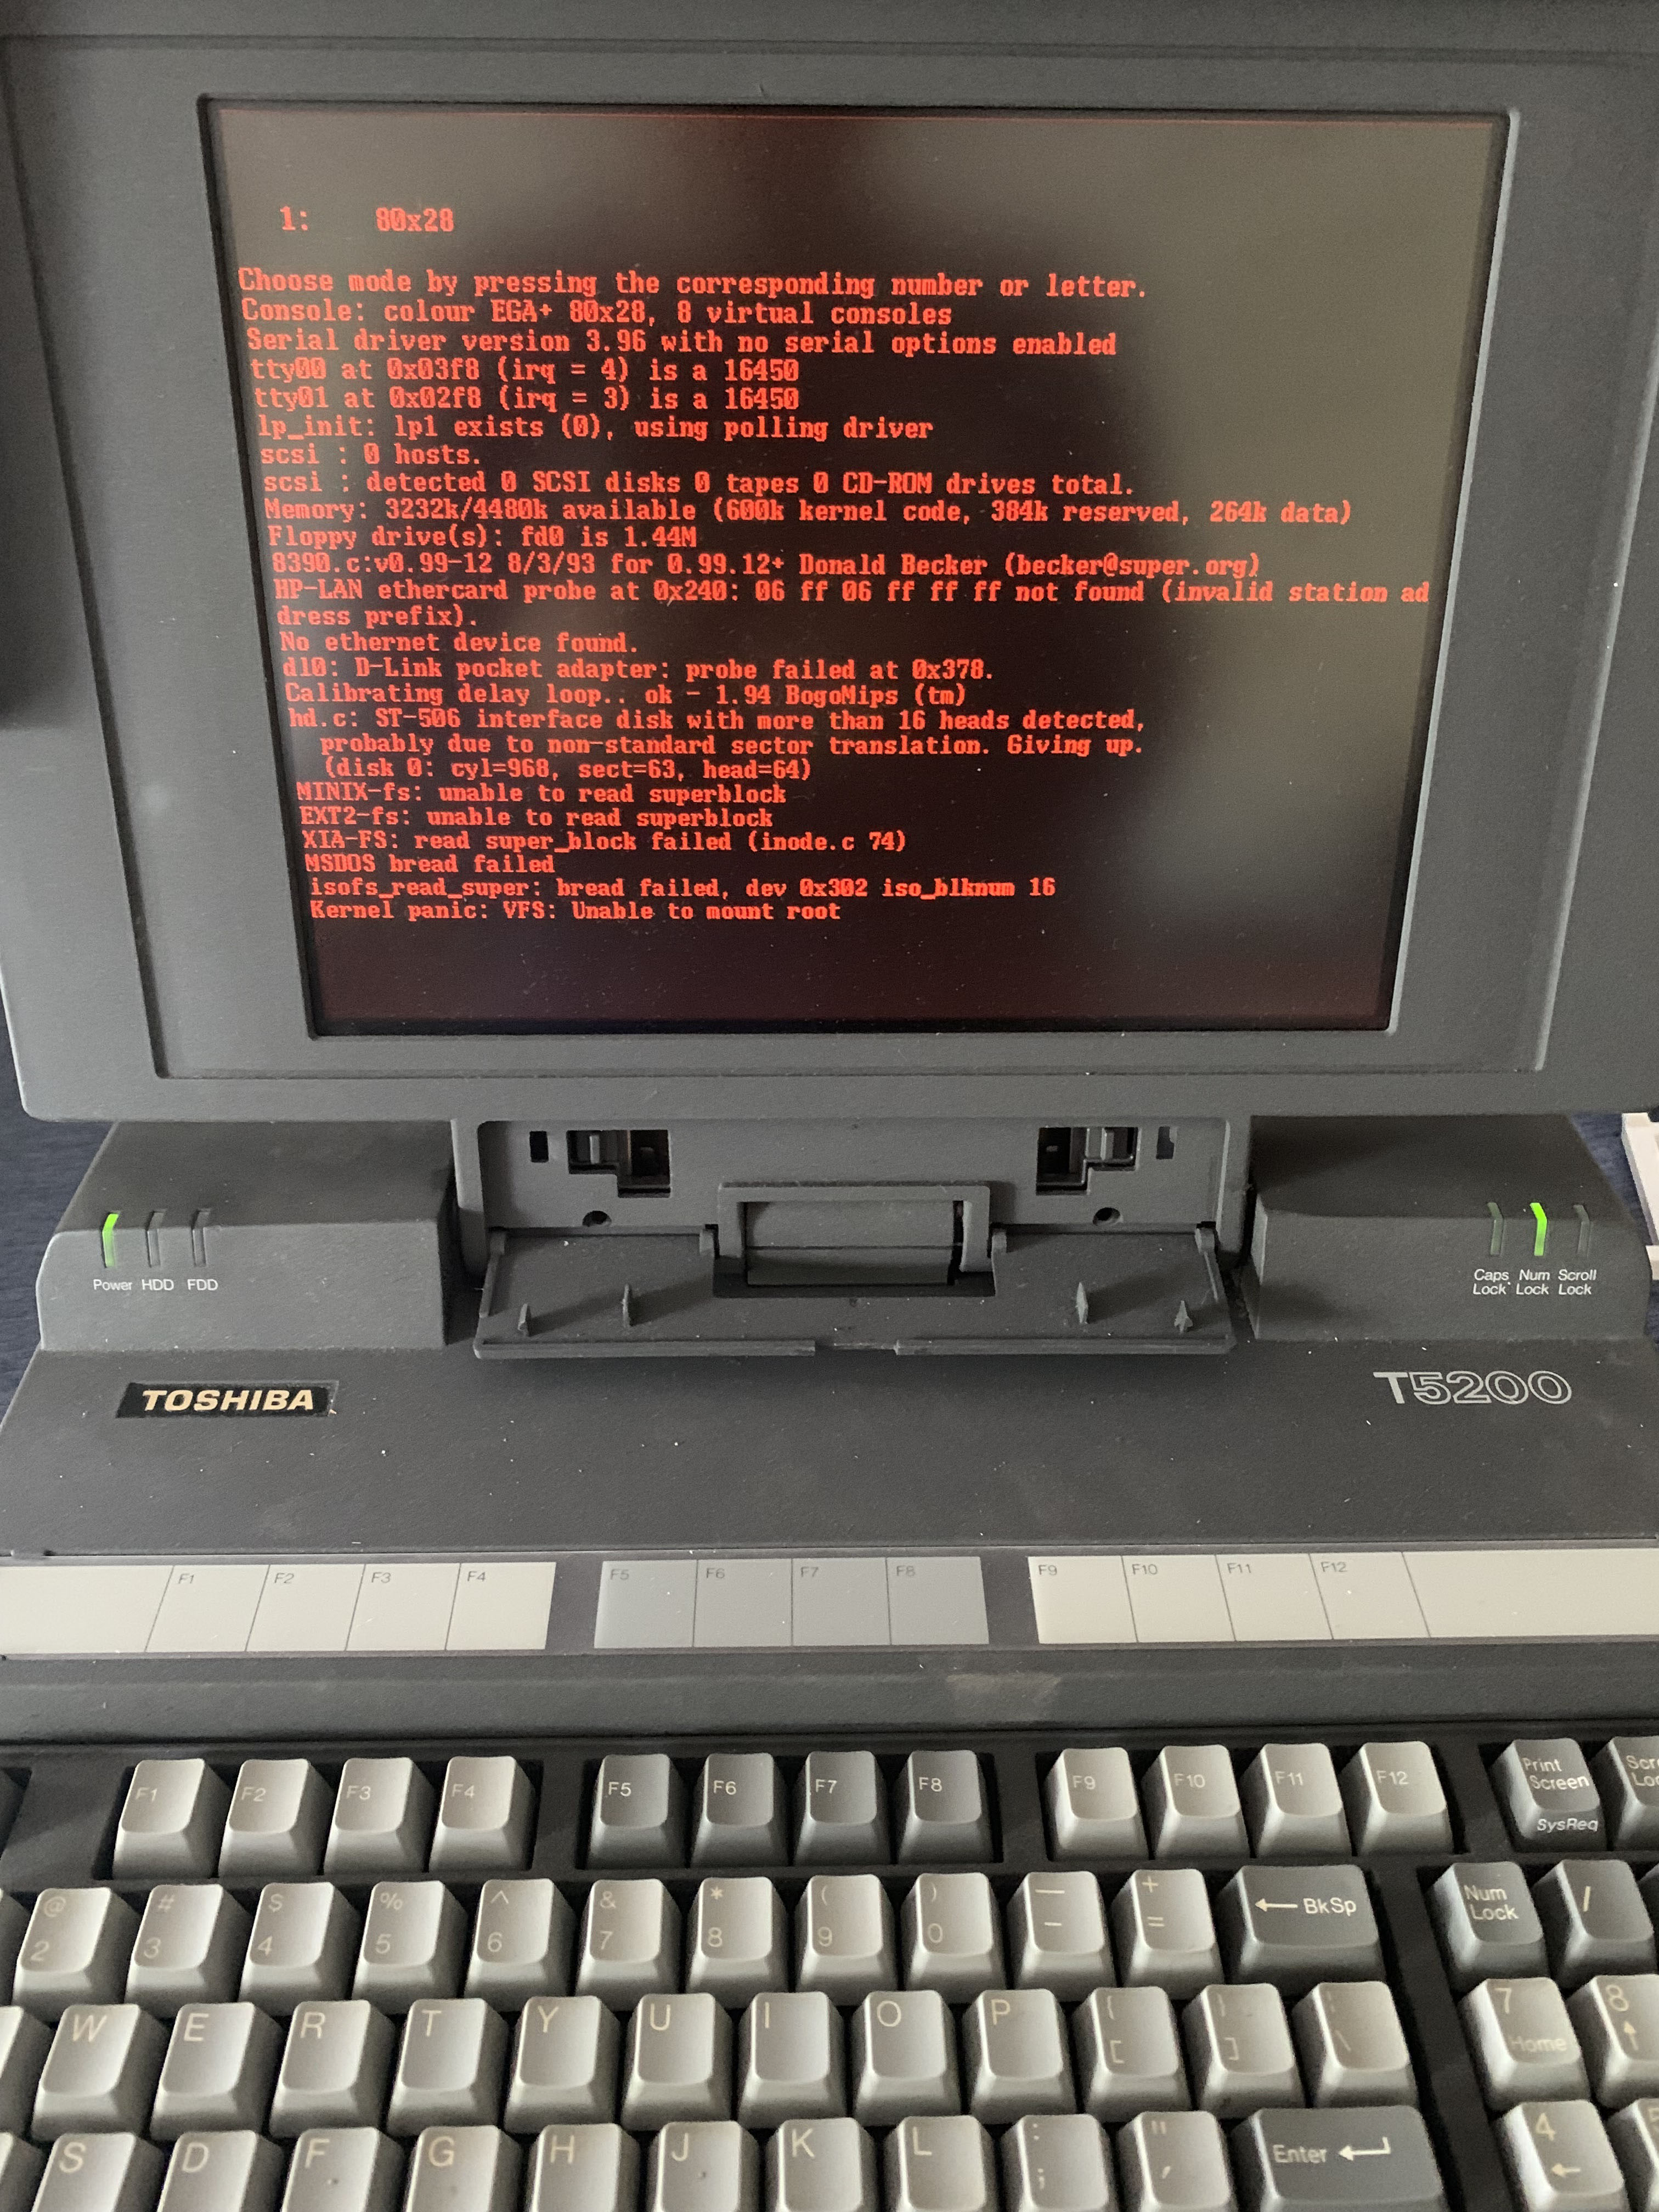
It was starting to seem like this was going to be *hard* to make work. I decided to go back to the first Linux distro I ever used in 1993: Slackware. I found a copy and extracted the kernel and copied it onto the T5200. I typed in the LOADLIN incantation and crossed my fingers and hit ENTER. The kernel started to boot! It got far enough to complain that it couldn’t find a rootfs and then hung. That was expected and that was progress! The kernel also complained that it didn’t believe my hard drive could be as big as it is and told me that there was no way it was ever going to use it.
 Slackware 1.0 kernel loading
More experimenting with somewhat newer kernels and some would load and some wouldn’t. At this point it was becoming tedious moving files to the T5200 so I setup a 386 emulator (thanks to Nina Kalinina for pointing me to PCem) as close to the same specs as my T5200 as I could, including a dd copy of the CompactFlash card from the T5200. This allowed me to try things much easier so I could try a lot more. I could increase RAM beyond what the T5200 had available to see if that made any difference. Plus, the emulator had a “working floppy drive” so I was able to test out floppy install methods from various distros. What I was discovering was that some kernels that would load fine with a floppy boot wouldn’t load at all with LOADLIN. The pattern seemed to be that LOADLIN only works with the very old zImage format and not the newer bzImage format, even though the documentation for LOADLIN said it should support bzImage.
Eventually I found LINLD which was written because of the same problems I had been experiencing with LOADLIN. Trying LINLD with a bzImage kernel worked! I was finally able to test out my custom built kernel and get it to boot on the emulator. One problem though: no matter what options I compiled in or arguments I passed on the command line, I could *not* get it to see the emulated hard drive. I then discovered I had the emulated hard drive on the wrong setting. It should be XT-IDE (AT) and not XT-IDE. Changing that suddenly allowed Linux to see the emulated hard drive. I moved the kernel over to the real T5200 and booted it up and saw the CF drive.
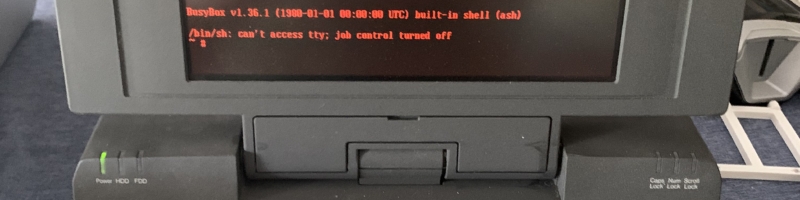
Unfortunately with so little RAM there wasn’t enough room to use an initrd or initramfs. I puzzled over how I was going to get Linux bootstrapped on the T5200 if I couldn’t get to a shell, and then I remembered that I don’t have to do the initial setup in the booted Linux. I can use the “big iron” to setup the partitions, format them, and copy a root file system. I mounted the emulated hard disk via loopback on Linux and setup the partitions and copied the files from the busybox initramfs I had been using. I tested it out in the emulator with LINLD and telling it the rootfs was the partition on the drive. It booted up and I was able to get to a shell within 4 megs of RAM. I then pulled the CF out of the T5200 and inserted it into the “big iron” and set it up the same way. Putting it back into the T5200 I was at last able to get my custom kernel to load and get to a shell!
 Linux booted to a shell on my 386 T5200!
—
While I haven’t yet reached my goal of all the software packages running that I want, I’m far enough along that I need to document my recipe so that I don’t lose my place and also so that if anyone else has a 386 and wants to try this, there’s something to copy.
Step 1: Setup a Docker container with a very old Debian distro that is entirely 32 bit. I’m using i386/debian:7 as my base.
- git clone https://github.com/FozzTexx/rekernel-room386.git
- cd rekernel-room386.git
- make -C docker
Step 2: Get Gray386. This has a patched version of Linux 3.7.10 which has been made 386 compatible. It also has a initramfs that we’ll use for the root filesystem.
- git clone https://github.com/marmolak/gray386linux.git
- binwalk --extract gray386linux/bin/bzImage
- binwalk --extract gray386linux/bin/_bzImage.extracted/3C62
- file gray386linux/bin/_bzImage.extracted/_3C62.extracted/228558
- cp -i gray386linux/bin/_bzImage.extracted/_3C62.extracted/228558 initramfs
Step 3: Build our stripped down kernel.
- cp config-386-4M-3.7.10 gray386linux/src/linux-3.7.10/.config
- docker/start ./billdit gray386linux/src/linux-3.7.10
Step 4: With your newly built kernel, you’ll need a way to boot it. If you have 8MB of RAM or more, you can boot with the initramfs extracted above. But if you’re like me, you’re going to need to remove the hard drive from your 386 and add a Linux partition with the contents of the initramfs on your “big iron”.
- fdisk /dev/sdN and add swap as partition #2 and Linux as partition #3 (DOS is first)
- mount /dev/sdN3 /mnt
- cat initramfs | ( cd /mnt ; cpio -idmv )
- umount /mnt
Step 5: Install LINLD into the DOS partition.
- curl -O https://busybox.net/~vda/linld/LINLD.COM
- mount /dev/sdN1 /mnt
- mkdir /mnt/linux
- cp LINLD /mnt/linux
- cp gray386linux/src/linux-3.7.10/arch/x86/boot/bzImage /mnt/linux/bzImage
- umount /mnt
Step 6: Boot it!
- Boot your 386 into DOS
- cd LINUX
- LINLD bzImage root=/dev/sda3


 Recent Toots
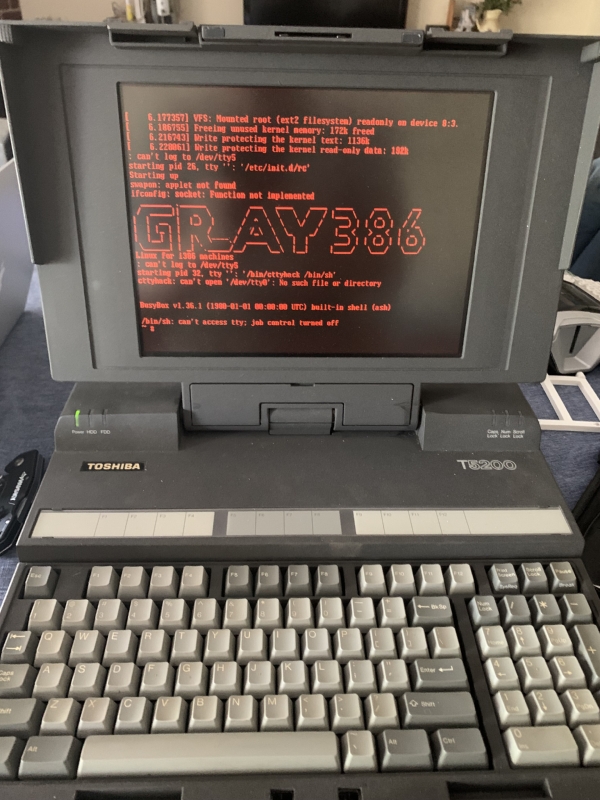